Showing posts with label Regency. Show all posts

Friday, January 26, 2018

1820's Undergarments

This technically counts towards the Historical Sew Monthly, so I guess I'll start there. It's kind of lame, so stick towards the end of the post for the real coolness.

This undergarment ensemble really needed a chemise. A basic Regency chemise is typically square necked, either high or low, with straight sleeves and a gusset in the underarm. I have one of those already, BUT I chopped the sleeves off once I decided I wanted it to be invisible under my sheer dresses. 

I've really been enjoying Cassidey Percoco's Regency Women's Fashion book. The dresses themselves aren't spectacular in my opinion, but that is what makes them so perfect as the base for whatever design you want. Just comparing to Janet Arnold, which are iconic in their own right, a lot of her dresses are designed around specific elements that you can't leave out. Anyways, a chemise pictured in their is almost EXACTLY like the ones I've drafted from the free pattern from the Sewing Academy. 

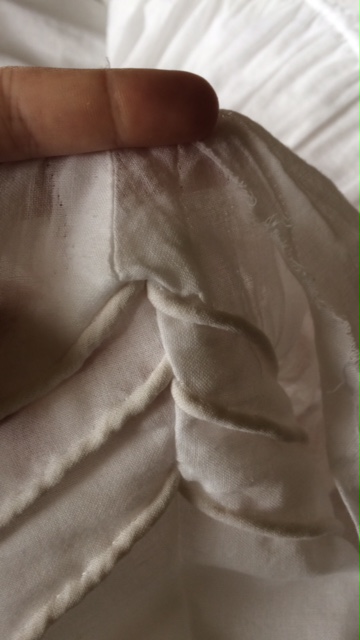
Except with a puffed sleeve. Enter a Re-do, from a chemise pulled the stash. See, I said it was lame! The holes from the original plain hem are still visible, although after a washing maybe not. 
This is the before, in its wrinkly state.

After is way cuter!


The Challenge: Mend, Re-Shape, Re-Fashion
Material: Cotton muslin
Pattern: Self-drafted using The Sewing Academy Pattern, modified to match the 1820-1840 one from Regency Women's Fashion


Year: 1820-1840
Notions: Thread
How historically accurate is it? Since almost the exact measurements are comparable to a pattern taken from an original, the shape is very good, although sewing machines weren't invented yet and it's done completely by machine. I'd give it an 80%. 
Hours to complete: 1 for the re-shape. 
First worn: For pictures, 1/26/18
Total cost: Nothing


For a complete 1820's undergarmnet wardrobe, a few things are needed:

-A chemise
-A corset, typically corded during this era, with minimal waist shaping but with a high bust and straps
-A petticoat, stiffened at the bottom with plenty of fullness to the back, and relatively smooth in front. These were made like earlier Regency petticoats, in that they need either straps or a bodice to hold the whole thing up. This is mainly due to the fact that the corsets are smooth all the way down, and without a well-defined waist it won't stay up. Whether or not these need to be layered to get the correct silhouette is yet to be determined; usually the actual dress on top was padded at the hem to hold it out, so I'm thinking I may be good with the one if I dip starch it. 

The exaggerated A-shape with the cording is very particular to the 1820's. 1830's petticoats have more of a bell shape with more fulness at least coming to the sides, and layering of petticoats to get the right amount of poof. I searched other blogger's websites for how they went about 1820's undergarments, and let me tell you folks, there ain't much. Whenever the question is thrown out about which era is the least represented, people always say, "1830's!" or "1840's!". That's because they forgot about the 1820's. So what works and what doesn't in terms of undergarments is only partially tapped territory. My thanks to Annaliese of The Young Sewphisticate and Quinn from The Quintessential Clothes Pen for providing ideas for 1820's undergarments. Per Quinn's suggestion, I decided that sleeve plumpers (AKA, croissants for your arms) aren't neccesary for 1825, as the sleeve done up in taffeta can hold it's own shape.

Mine is based on an example in the V and A; I haven't researched these extensively, mostly because this one was exactly what I was looking for! It's hard to see in the picture, but through other detail shots you can see that it has straps, and that it has 12 rows of cords, sewn at intervals. I couldn't figure out why it had that seam at knee level, although I figured it out halfway through the project. 
1820-1829 Petticoat from the V and A

The pattern was drafted using just the skirt part of another pattern in Cassidy Percoco's book. Looking back, this pattern wasn't perfect for this, just because the front panel needs a little more shaping a little closer to the front, rather than way back at the sides where the next panel joins. The person who originally wore this was at least 6'' smaller, and I didn't realize this when I first started. As a base though, it's fine. 

There are two different ways you can do cording: the sandwich method, where you sew a facing to the back and the cords in between the layers, or the tuck method, where you iron your fabric like you're sewing a tuck and then squish the cord in. Because the panels are A-shaped, I opted for the tuck method, just because I wasn't envisioning a facing on a diagonal panel. This actually ended up being really frustrating, because ironing on a curve is annoying and I just sort of stopped caring if the seams lined up. I was ironing yet another tuck when I realized: the extant petticoat was made with the cords sewn into a long rectangle of fabric, and then sewn onto the bottom of a short A-shape petticoat. This was a forehead smack moment, and I wish I had thought of it sooner. Oh well, I'm still really happy with the shape of it, and it lays nice and flat without any shirring.


This corset I've had for maybe 2 years now, and this is it's first blog appearance since it's been finished. It's not much to look at, in all it's flossed-in-two-colors laced-closed glory, but it's very comfortable and gives me the shape I want.

Stay tuned, I have a really cool announcement in the next few days!

Monday, December 11, 2017

1799 Blue Tunic

Photo courtesy of my awesome sister Camille!


So the c. 1800 evening dress needed a little interest/color to it. I was open to almost any outer-dress option, except I didn't want an evening robe; basically all original full-length robes are trained, whether that's from a fashion plate, original, or painting. I've seen a lot of costumers just leave the train off because they want to dance in it, but to me that's the wrong way to go about it. I wanted something that would be accurate for the occasion, without fudging, because I knew that existed.
c. 1797 Open Robe from the MET

Little tiny sleeveless spencers, short jackets and half robes were what I was looking into. The possibilities for the styles, colors, and materials were endless! They can be seen in paintings, although they are very common in fashion plates. There really aren't any extant examples, so I didn't have anything to go off of there. I read as many descriptions as I could from magazines; the materials that I found were muslin, satin, lace, crepe, and sarcenet (a thin kind of silk; exactly how thin is yet to be determined). Yellow, blue and pink were the most common colors used, although I did find some black, orange and purple examples.
 April 1799 Ladies Museum Fashion Plate
January 1800, perhaps published in the Ladies Magazine?
May 1799 Ladies Monthly Museum

I decided on this last one....because Neoclassicism. Plus it didn't seem like very much work, and the amount of color per square inches was higher than the sleeveless spencers. Because there really aren't many actual existing half-robes for evening wear, I tried to go about the construction from the most logical standpoint. Unlined seemed best, and with the new discovery of the whole bodice-and-skirt-cut-in-one-with-a-drawstring, that seemed a good idea, keeping the cut of it as simple as possible. The original description (minus the long S, which doesn't exist on my keyboard) from Ladies Monthly Museum is this:

"The Greek vest, of blue muslin, fastened by a diamond clasp on the right shoulder, with a silver girdle and trimming of silver round the skirt; plain gown, with sleeves very short, and a neat pleating round the neck and sleeves. - Turban, a la Grec, blue muslin, with silver bandeau, and ostrich feathers. Shoes blue silk."


I draped the half robe on my dress form, trying to get the best neckline curve, and also balancing the fullness from the shoulder with the fullness at the waist.
This WAS version #1

This is one of my really not-smart moments.....I drafted the half robe in an afternoon of boredom probably back in August and then threw the finished thing back in my scrap bin. When I was ready to pick it up in September, I realized I had used that scrap for another mock up a week or two ago. Whoops. Let's be honest, it's a rectangle with a triangle at the top. It doesn't look like anything special.


The whole thing took me probably under 20 hours, completely hand-sewn. The material is this cotton voile from Mood Fabrics, which is close to historic muslin, just not as thin or as uneven; it took almost exactly 2 yards of fabric. The trim at the bottom isn't accurate at all, so I wasn't wanting two rows of it. Someday, I would like to sew on either real silk ribbon, or embroider the bottom so it's a little more authentic. Again, without existing examples, who's to say how this would have been carried out? It's still a shot in the dark. Yet we DO know rayon isn't accurate, I'm not kidding myself.

The waist originally was just a drawstring; you pull it on over your head and tighten it, adjusting it to be even all the way around. The ribbon at the waist was just sewn on one side, with a hook on the other. I discovered at the photo shoot that it would NOT. STAY. PUT. The ribbon kept slipping all over the place. You can see in some of the pictures it's too slippery. For pictures it was fine, but before the ball I permanently tacked the ribbon in place, so now the whole thing isn't adjustable. Oh well, adjusting the back was a pain.
In theory, this picture would be really cool. But when a white dress meets sunlight.....I call it, "blobbing." New verb for the day, folks.

The little pin on the shoulder I already owned, it was cool to recycle that. The description from the Ladies Monthly Museum mentions a diamond clasp, even though you can't see it in the picture. I think more research would be required to know exactly what was accurate, but I figured that the only accurate way to do that would be to wear real diamonds, which I couldn't afford anyway. I like the size of this one, it feels like a piece of jewelry, without being too heavy on the shoulder.

This hairstyle is based on a Roman bust from the Louvre, called, "The Kaufmann Head", ca. 150 BC. I wanted to do something that was more purely Classical, rather than Regency.
Female head, modeled from the Aphrodite of Cnidus, called the Kaufmann Head. 


I texted my hairdresser, and asked how I could get my hair like this. She said, "Oh, you can't...you have to have naturally curly hair."

Challenge accepted.

So I Googled how to create naturally-curly looking hair for people with straight hair. I came across...the straw method. It is the most unglamourous and undignified process in which I won't even care to describe, although if you are interested you can Google it. It works like a charm though, if you use enough product; it's the only way to curl your hair so close to the scalp. A heat tool you would burn yourself pretty easily. It also stays put through 5 hours of dancing. I'm surprised that someone actually came up with this; I wouldn't recommend it for the average day, it's way too much work for results that are a frizzy disaster waiting to happen if you don't put it up.

So, this particular bun is not my finest moment, but I WAS CONCENTRATING ON THE FRONT PEOPLE.

I pinned the back and undersections into a bun, curled the rest, pulled them into a ponytail over the bun, then gently arranged the curls over the base. Pin, and done. That part is super easy. Finish off with ribbon or trim. The overall effect is simple, yet stunning. If you leave the curls as-is, it looks more sleek, although maybe a little too perfect. I like to gently pull the larger curls in half; it adds a tiny bit of frizz, which gives it the "I woke up like this and carelessly threw it up yet it still looks perfect" look. Because anyone with naturally curly hair will tell you that no frizz is really hard.

Since I've brought up the whole, throw-away-an-almost-finished-mock up mistake, what is YOUR most embarrassing costuming mistake?

Thursday, December 7, 2017

Ca. 1800 Reproduction Evening Dress

Pictures taken by my illustrious sister Camille at the Idaho State Capitol.
This dress was first completed last October. It was my first real attempt at an accurate Regency dress; I'm pretty happy with how it turned out. I chose the design because of the Neoclassical lines; I also loved the sleeves, the length and drape of the train, the gathers in the front with pleats in the back. It's simple enough that it could be worn anywhere between 1795-1802, or even later depending on who wore it. This is a reproduction from the LACMA; the original dress is c. 1795. Because I raised the waistline into more of a true Regency empire waistline, it's just a tad later.

Sleeve detail comparisons


I lopped the sleeves off my chemise, and I didn't realize until we got into better light that the show-through looked a little weird...

It was completely handsewn, except for the long skirt seams. The only reason I did that was because, originally, I didn't know how the train would lay. So I cut the front and back both the full length of the train, then chopped off the front while it was on my dressform.

The construction was pretty simple; after doing some research, I took the Simplicity 4055 that never ends, even though I really am disliking that pattern every time I use it. I had to hack it pretty hard; I took a strip of muslin and figured out the fulness ratio I wanted across the bust, then transferred that to a well-fitting mockup.
This picture turned out so crazy!

I was stumped at first as to how you would get dressed in this dress. The back is cut on a fold....there's no apron-front....and the front is cut on a fold. Huh. It took me a while of pondering and asking around before I realized...that it actually didn't need it. It has a drawstring that runs from the shoulders to the front, and a drawstring from the side seams to the front. To get it on...pull it open, then it just goes right over your head and you pull up the strings and it ties on the inside. It really is the most adjustable dress in the world; it fits my sister who is a different shape and size as well.

It didn't occur to me that, with the more pure Neoclassical lines of the dress, the waist should have been not so close to the bust, but more dropped. Whoever dressed the mannequin of the original dress  had to take a complete shot in the dark in regards to how big the lady who wore it was in the bust; with a drawstring top and bottom, it's anyone's guess. This mannequin is more busty, but it could have been a smaller lady, in which case the waist would have laid not so high on her. Oh well. Live and learn.

I also learned, through purchasing Cassidy Percoco's Regency Women's Fashion and looking at the diagrams, that this type of construction you would have cut the front bodice and skirt in one long piece, and run a drawstring through that. So ridiculously easy! Except I was convinced that the skirt needed ALL. THE. GATHERS. But I didn't want to look puffy on top. So I lightly gathered the skirt to the bodice, then put a drawstring on. My only regret, in this whole design, was over-doing it on the skirt gathers. If I had known that cutting them in one was a thing, I would have tried it.

The sleeves were interesting. Last year, I ran out of time and sewed on quick puffs. After wearing it to the ball, I decided it was way too boring; with the train pinned up, it was your basic, boring little white Regency dress. So this year, I went back to the original design and created a shaped cuff, with cord sewn in for a 3-D swoop. I made the cuff the overall correct length on one side, then sewed it to another side that was overly long. Then I sewed a curved line.

Next I laid the cord inside it, pushing it up against the stitching as close as possible.

Rather than sewing the piping evenly sandwiched between the cords, I rolled the cord even further past the stitch line so that it's basically only being held by the outer layer.

I just recycled the old puff, but I had to mess with the shape of it to get it to lay correctly without any weird puffs in the underarm area.
The first time around where it wouldn't lay right.

Corrected underarm, about to be topstitched.

For dancing purposes, I sewed on some tiny bars to them hem, and then the corresponding hooks were sewed at different intervals to the outside of the petticoat. The hem doesn't look fantastic when it's pinned up. When the hem is down, the side seam gets dragged towards the back quite a ways, pulling fulness from the front. When the train is up, a lot of the side falls forward, adding more of a "might possibly be pregnant but trying to hide it" sort of look.

I will talk about the hairstyle in another post!

Wednesday, August 2, 2017

#2: Current Projects

I have a couple projects going on at once.

This late Victorian corset has been fun; this is my first attempt at roll-pinning, so we'll see how that goes. I'm basing the boning pattern off of one from the ROM. There was a LOT of hand-basting involved.

Last year, I made a Regency evening gown (still no good pictures, sorry!). I ran out of time before the ball to truly reproduce the original sleeves I was basing it on and instead did a plain puff sleeve.  I pulled it out recently to replace them with the more interesting ones. The lower half cuffs are really interesting!

My computer is being finicky and now the picture is sideways....you get the idea. The cording is done by lining the cuff, then laying the cord between the layers. Instead of flat-sewing them into a channel, I sewed the curve that I wanted, then squished the cording up against it, then rolled the cord over the stitching line and did another row of stitches The result is that the cord is encased in only the outer layer, and the stitching is hidden beneath the cord. On the underside, there are two rows of stitches almost on top of each other. 

Which leads me to my next project, and the reason I ever revisited it in the first place. I was wanting something to wear over it, because it was rather boring, especially since I pin up the train for dancing. Open robes are automatically out, because they ALWAYS have a train in originals. I've seen costumers simply cut it floor length, but considering that we don't see any extants like that...that isn't the way to go about it. So the only parameters I was looking for were a colored garment of some kind that did not have a train.

Originally I thought a little sleeveless bodice, BUT....since you now know that I love research, I started researching designs. The white under-dress is appropriate for 1797-1802, so I tried to find a fashion plate within those dates. While going through several 1798-99 magazines, I found a few designs that showed what was called a half-robe. After looking through dozens of various half-robes and sleeveless bodices, I picked this one, because of the Neoclassicism; the Grecian lines are my favorite!
1799 Ladies Monthly Musuem

Janet Arnold has a pattern for a half-robe, but she states that they were only worn over a dress or petticoat for morning wear. However, the fashion plates and advice from 1799 clearly show a few that are intended for evening, or full Dress. A half-robe and half-dress are very different; a half-robe is a short robe, while half-dress refers to the level or formality of dress, being sort of half-formal.
Here is a 1799 half-robe for half-dress.....

...and a 1799 half robe for full dress! The image on the right is also a good example of the trained open robe I was referring to.

Since I love to be different, I decided that a half-robe it is! Especially since I haven't really seen one done accurately for formal wear. The Simplicity 4055 pattern (which I have successfully used several times) is an example of how most modern people interpret that look, by having the outer layer and overskirt sewn as one to the dress. Historically, the half-robe was a distinct look created by wearing a basic dress or petticoat, and then another dress over the top. This makes it easier to have many looks in one by simply swapping out the over dress, rather sewing them together.


So here is the draped half robe on my dress form. I was merely going for the overall shape and fullness ratio, obviously it will be a bit longer. I also wanted something that was easy, so essentially it is 2 rectangles with one corner cut off, sewn up the long edges only up to the waist edge. It will close with a drawstring around the waist, and some sort of clasp or pin on the shoulder. The original description says it should be a diamond clasp...however, I'm on a budget and cannot afford a diamond clasp.

I don't have the fabric for the half-robe yet, and I don't have the hardware for the corset yet. Funds are low, so I'm waiting to be paid in August to order supplies.