Showing posts with label 1800. Show all posts

Thursday, December 7, 2017

Ca. 1800 Reproduction Evening Dress

Pictures taken by my illustrious sister Camille at the Idaho State Capitol.
This dress was first completed last October. It was my first real attempt at an accurate Regency dress; I'm pretty happy with how it turned out. I chose the design because of the Neoclassical lines; I also loved the sleeves, the length and drape of the train, the gathers in the front with pleats in the back. It's simple enough that it could be worn anywhere between 1795-1802, or even later depending on who wore it. This is a reproduction from the LACMA; the original dress is c. 1795. Because I raised the waistline into more of a true Regency empire waistline, it's just a tad later.

Sleeve detail comparisons


I lopped the sleeves off my chemise, and I didn't realize until we got into better light that the show-through looked a little weird...

It was completely handsewn, except for the long skirt seams. The only reason I did that was because, originally, I didn't know how the train would lay. So I cut the front and back both the full length of the train, then chopped off the front while it was on my dressform.

The construction was pretty simple; after doing some research, I took the Simplicity 4055 that never ends, even though I really am disliking that pattern every time I use it. I had to hack it pretty hard; I took a strip of muslin and figured out the fulness ratio I wanted across the bust, then transferred that to a well-fitting mockup.
This picture turned out so crazy!

I was stumped at first as to how you would get dressed in this dress. The back is cut on a fold....there's no apron-front....and the front is cut on a fold. Huh. It took me a while of pondering and asking around before I realized...that it actually didn't need it. It has a drawstring that runs from the shoulders to the front, and a drawstring from the side seams to the front. To get it on...pull it open, then it just goes right over your head and you pull up the strings and it ties on the inside. It really is the most adjustable dress in the world; it fits my sister who is a different shape and size as well.

It didn't occur to me that, with the more pure Neoclassical lines of the dress, the waist should have been not so close to the bust, but more dropped. Whoever dressed the mannequin of the original dress  had to take a complete shot in the dark in regards to how big the lady who wore it was in the bust; with a drawstring top and bottom, it's anyone's guess. This mannequin is more busty, but it could have been a smaller lady, in which case the waist would have laid not so high on her. Oh well. Live and learn.

I also learned, through purchasing Cassidy Percoco's Regency Women's Fashion and looking at the diagrams, that this type of construction you would have cut the front bodice and skirt in one long piece, and run a drawstring through that. So ridiculously easy! Except I was convinced that the skirt needed ALL. THE. GATHERS. But I didn't want to look puffy on top. So I lightly gathered the skirt to the bodice, then put a drawstring on. My only regret, in this whole design, was over-doing it on the skirt gathers. If I had known that cutting them in one was a thing, I would have tried it.

The sleeves were interesting. Last year, I ran out of time and sewed on quick puffs. After wearing it to the ball, I decided it was way too boring; with the train pinned up, it was your basic, boring little white Regency dress. So this year, I went back to the original design and created a shaped cuff, with cord sewn in for a 3-D swoop. I made the cuff the overall correct length on one side, then sewed it to another side that was overly long. Then I sewed a curved line.

Next I laid the cord inside it, pushing it up against the stitching as close as possible.

Rather than sewing the piping evenly sandwiched between the cords, I rolled the cord even further past the stitch line so that it's basically only being held by the outer layer.

I just recycled the old puff, but I had to mess with the shape of it to get it to lay correctly without any weird puffs in the underarm area.
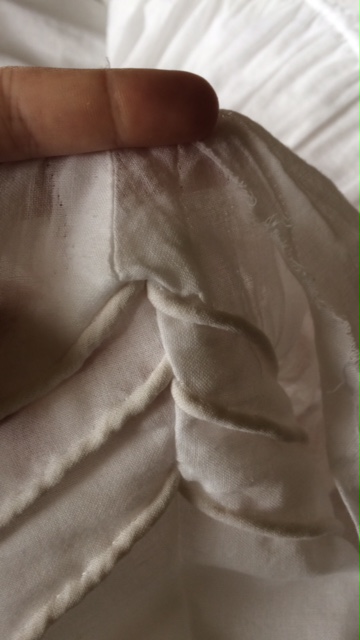
The first time around where it wouldn't lay right.

Corrected underarm, about to be topstitched.

For dancing purposes, I sewed on some tiny bars to them hem, and then the corresponding hooks were sewed at different intervals to the outside of the petticoat. The hem doesn't look fantastic when it's pinned up. When the hem is down, the side seam gets dragged towards the back quite a ways, pulling fulness from the front. When the train is up, a lot of the side falls forward, adding more of a "might possibly be pregnant but trying to hide it" sort of look.

I will talk about the hairstyle in another post!

Wednesday, August 2, 2017

#2: Current Projects

I have a couple projects going on at once.

This late Victorian corset has been fun; this is my first attempt at roll-pinning, so we'll see how that goes. I'm basing the boning pattern off of one from the ROM. There was a LOT of hand-basting involved.

Last year, I made a Regency evening gown (still no good pictures, sorry!). I ran out of time before the ball to truly reproduce the original sleeves I was basing it on and instead did a plain puff sleeve.  I pulled it out recently to replace them with the more interesting ones. The lower half cuffs are really interesting!

My computer is being finicky and now the picture is sideways....you get the idea. The cording is done by lining the cuff, then laying the cord between the layers. Instead of flat-sewing them into a channel, I sewed the curve that I wanted, then squished the cording up against it, then rolled the cord over the stitching line and did another row of stitches The result is that the cord is encased in only the outer layer, and the stitching is hidden beneath the cord. On the underside, there are two rows of stitches almost on top of each other. 

Which leads me to my next project, and the reason I ever revisited it in the first place. I was wanting something to wear over it, because it was rather boring, especially since I pin up the train for dancing. Open robes are automatically out, because they ALWAYS have a train in originals. I've seen costumers simply cut it floor length, but considering that we don't see any extants like that...that isn't the way to go about it. So the only parameters I was looking for were a colored garment of some kind that did not have a train.

Originally I thought a little sleeveless bodice, BUT....since you now know that I love research, I started researching designs. The white under-dress is appropriate for 1797-1802, so I tried to find a fashion plate within those dates. While going through several 1798-99 magazines, I found a few designs that showed what was called a half-robe. After looking through dozens of various half-robes and sleeveless bodices, I picked this one, because of the Neoclassicism; the Grecian lines are my favorite!
1799 Ladies Monthly Musuem

Janet Arnold has a pattern for a half-robe, but she states that they were only worn over a dress or petticoat for morning wear. However, the fashion plates and advice from 1799 clearly show a few that are intended for evening, or full Dress. A half-robe and half-dress are very different; a half-robe is a short robe, while half-dress refers to the level or formality of dress, being sort of half-formal.
Here is a 1799 half-robe for half-dress.....

...and a 1799 half robe for full dress! The image on the right is also a good example of the trained open robe I was referring to.

Since I love to be different, I decided that a half-robe it is! Especially since I haven't really seen one done accurately for formal wear. The Simplicity 4055 pattern (which I have successfully used several times) is an example of how most modern people interpret that look, by having the outer layer and overskirt sewn as one to the dress. Historically, the half-robe was a distinct look created by wearing a basic dress or petticoat, and then another dress over the top. This makes it easier to have many looks in one by simply swapping out the over dress, rather sewing them together.


So here is the draped half robe on my dress form. I was merely going for the overall shape and fullness ratio, obviously it will be a bit longer. I also wanted something that was easy, so essentially it is 2 rectangles with one corner cut off, sewn up the long edges only up to the waist edge. It will close with a drawstring around the waist, and some sort of clasp or pin on the shoulder. The original description says it should be a diamond clasp...however, I'm on a budget and cannot afford a diamond clasp.

I don't have the fabric for the half-robe yet, and I don't have the hardware for the corset yet. Funds are low, so I'm waiting to be paid in August to order supplies.

Monday, January 9, 2017

Regency Attire and the Greeks: Looking at History Through Rose-Colored Glasses

This is a long-standing research project for me, and it has taken me to parts completely unknown. It all began with: what is historicism?

Historicism is a fascinating topic; it is derived from the idea that history long ago is influencing choices that we make today. Well duh! It can be as complicated or as simple as you choose to make it, but there as many different facets to historicism that are played out in different ways. In the world of fashion, we are constantly being influenced by things that have already been done, and finding new ways to make it "the new vogue"; in other words, taking something that was already tried, but in an exciting way that fits the newly adapted modern taste. Sort of a rose-colored glasses-type of thing.

When recreating historical clothing, most people agree that peering through a modern lense of any sort dilutes the true accuracy of any garment, simply because contemporary tastes are different than 100, 150,  or 300 years ago. But another question to ask yourself is, what if looking through a lense would actually benefit us, as long as the lense was situated in the correct position?

Consider this: looking at a garment without any context is rather boring. You can learn a lot with an open mind,  but with no expectation there is not really much to look at. When you look at a dress, you have no idea appreciation for why it is what it is. And we have already established that a timeline working backwards from where we are today is useless, as it tells us nothing we don't already know other than, "My, that dress is ugly!" of  "I can't believe people actually wore that!" or "Wow, I was born in the wrong century! Except for corsets...." You have no historical lense.
1830-34 dress from the V and A....1830's are probably the most misunderstood and most hated decade of fashion in the history of fashion.

To get into the correct mindset, it is important that you adjust your glasses to the date you are researching, and look both backwards and forwards. What has been accomplished at this current point in history? What is happening? What is everyone interested in? What was everyone interested 10 years ago? That is the backwards. Now the forwards: what can I do with this current dress in 2 years to keep it fashionable? Or 5? Is there a forseeable future for the next fashion-forward step, or is it unexpected? The most interesting thing I have learned in this research project is the importance of not only understanding the fashion timeline, but the previous 50 or so years in politics, art, music, religion, and mindset.

For a series of challenges which I sometimes participate in, one of the challenges was Historicism. Cool! I was excited to see what everyone came up with. A few who accepted the challenge chose to use Regency attire, simply because it's an easy default. Literally every costumer knows that as the 18th century came to a close, the good people of Europe and the America's looked to the Greeks for fashion inspiration, particularly when it came to color and a high-waisted, simple style. The Neoclassical era was born, and history was changed forever.
C. 1804 Neoclassical dress from the V and A

I began contemplating what I knew already about the Neoclassical era, which is pretty much summed up in the above statement. As it churned the idea around in my mind, it began to sound off. I pulled out my calculator and punched in some numbers. The amount of time that passed from the end of the Classical era of art (around 31 B. C.) to the beginning of the Neoclassical era was......


 1,826 YEARS!!!  Ludicrous! Hilarious! Actually, quite ridiculous. That's like us, looking to Jesus Christ for fashion inspiration. Or the Bayeaux tapestry.
Those helmets need to make a comeback....oh, and the shields. Note the blue horse.

What the heck were they looking at? No internet, 1,800 years after the fact. As seperated as we feel from even 100 years ago, with internet and resources, the Regency perspective of ancient Greece must have been even more romanticized that ours. Their rose-colored glasses were definitely on for this one as they examined the only source that they had: statues.

Next Up: The Neoclassical Era, and the Reality of 1800 years

Tuesday, May 24, 2016

Challenge #5: Holes Update

Even though it may seem as though I've dropped off the face of the blogging planet, my current project is a Regency corset. Yay! It's come along a little on the slow side; at first I thought the cording would be fun, but after the first panel....yeah, not so much. Actually, I do enjoy the cording, but it took me a little while to figure out what the best size cord channel was. After much pulling, yanking, and hand cramping, I finally ripped out and re-stitched a few from 1/8'' channel to 3/16''. What a difference!

Living in a dry climate, my air-erasable pen disappears REALLY fast. On my first panel, I was going along, taking my sweet time tracing and getting it all perfect. As I started pinning the pieces together to start sewing, I saw that the very first lines I had drawn were already disappearing. AAAHHH! So I sewed like the wind, and that was part of why some of the channels ended up so tight. But dang, they sure turned out nice!

On the next back panel, I had the sense to go through and sew the middle seam of each set of cords. Then it didn't matter too much if the lines were erased because I had a better idea of how far away to sew it. I also didn't try to force the cord in and went back and re-sewed a few. It was worth the time to re-do a few. Plus an entertaining story put me in a better mood to fix it, vs. watching Lord of the Rings which I was only partially paying attention to what I was doing. Hence the not perfectly even embroidery, lol. The sun has yet to cooperate with my tracing efforts, so the front has not even been started with the cording. 

Right now, I am in a bit of a slump because I got my wisdom teeth pulled two days ago. My brain is totally unmotivated with the pain-killers, so I'm guessing Historical Sew Fortnightly entry will be a little late. The dentist recommended a hot compress; this little gel pack was the only thing Walgreens had. I have named him Penguino, and he has been of great comfort to me in my time of suffering.


Plus I've had a friend ask me to make a few small items before the first week of June, so that is also slowing me down a little. She rides her horse side-saddle and enters in small competitions with her gorgeous Gypsy Vanner; she enters in costume classes and has a gypsy costume, but she wanted a headscarf that matched her outfit. I didn't take a picture of the finished product, but here is a picture of the pretty trim.

Also, last minute they changed the open 'costume class' to Edwardian side-saddle class, and needs a habit shirt to go under her riding jacket. So far, I've got a couple ideas.

A. A chemisette with a seperate stock tie. This is today a part of traditional dressage and fox hunting attire. She would need to find a stock pin, either fancy or plain. This is my favorite in the way it looks, as it isn't too complicated to tie and is acceptable in the modern show ring.

B. A chemisette with an actual cravat. Probably my least favorite option, as they are more complicated to tie and she doesn't prefer anything that rides up too high on the neck. Also, they are not very feminine. I know the cravat is hard to see in this fashion plate, but up close I am not entirely convinced that isn't a man.

C. A chemisette with a jabot, either lace or muslin. I think this might be the easiest option to make and wear as I think I can make them one piece, although the ruffles might be too fussy. I also don't think they are particularly Edwardian; when I think of Edwardian attire I think sleek and traditional (as far as riding habits), and jabots are really a Colonial garment. The below jabot is listed on the MET as circa 1900. Ok, so maybe it is an option. But I think I would like to avoid ruffles.