Showing posts with label Historical Sew Monthly. Show all posts

Tuesday, February 27, 2018

HSF #2: 1880's Reproduction Corset

The goal with this corset: to make an awesome corset, no skimping on the flossing, all the way through, that could work under an 1880's dress.


I wanted to not get too crazy with color choices, so I looked around at all the corsets within this time frame. Overall, I really liked this particular corset because the seam lines were very comparable to the Truly Victorian pattern I already had. I copied the exact boning design; the back diagonal section I had to fudge a little because my corset overall turned out longer, and I think I may be a little smaller, so the exact angle is different. In fact, it didn't turn out the same on both sides, because I finally succcessfully got both sides even; so the one side has 6 diagonal, and the other 7.


c. 1880-85 Corset in the Royal Ontario Museum


After reading some articles and watching some videos, I decided to try roll-pinning. Roll-pinning is the theory that, if you pin something on a flat plane, and wear it on a curved sphere, the outside layer will be too small, and the inner too big. This process involves pinning the two layer together on a sphere; in this case, I used my larger pressing ham. His name is Hammie. The two layers were then hand-stitched together. It was a lot of work....because I haven't done more corsets, I don't know how it would have turned out if I hadn't pinned it like this. But overall, it lays pretty well without many wrinkles. So, success, I guess?

I also decided to try putting the seams on the outside (why?), and covered it with the boning channels. As I was constructing it, I wasn't sure why I picked that, but later it ended up coming in handy.
This is the closest I've come in corset-making to an even back.

Once the grommets, boning channels and busk were in, I tried it on. It had been like 6 months since the mockup had been worn. Initially, it took some time to figure out the best way to lace it up; the first time I laced it too tight in the ribs. Also, I stabbed my hands three times really hard because I pinned the bones in rather than baste across the top. Double hole for each stab, with the pin going in and out and I had to carefully draw it out. So I was hurting and frustrated. After coming back to it with more patience and time (and the bones basted in), I figured out the best way to lace it.

I only have two small regrets with this project that can technically be fixed:

1. The bust shaping. To fix the bust, I ripped the front casing off halfway and added in a really tiny gusset to round it out a little more. Once the seam allowance was trimmed and the casing back on, you can't even tell it's there! It's not perfect on one side, but better overall. Still want to perfect that.

2. I would never have even thought of the wider bone, except for the original, so I thought I'd try it. Whoops....didn't realize that exact seam line curves forward quite a bit, and it hits right at my hip bones. So the tighter I have it laced, the more the bone tweaks, although the hip bone thing is a little uncomfortable, but not as big a problem as I thought. Technically, I could remove the bone and leave the channel (it needs to cover the seam) and re-angle it so it's a little closer to my actual side, and more upright.

There are a few areas of this project that mystify me a little bit: the natural form tummy, and hip spring. Back in July, I had sort of a hip-spring revalation after adding gussets to my older corset. Wow! What a difference! So comfortable and attractive! I no longer looked top-heavy. With the old corset gussets, it gave me a lot more spring out the back. With this particular corset though, it gives me more spring out to the side, and more flatness in the back. Huh. Some people are amazing at that balancing act; I'm still trying to figure out if perfection is possible when you have less body to work with?!? Like, do I have to pick between the back or the side? And if I try to balance between the two will it not be so extreme and not even be worth trying?

The other undergarments made to go with this are a basic natural form petticoat, and a bum pad. Initially, the pad was made to wrap all the way around my hips to the side, but I decided that I was hippy enough without any help. Actually, I wasn't even going to make a hip pad, but after the petticoat was made it was clear that the silhouette was really, really sad without it. It took several tries to get this the right shape; I'm so used to mid-Victorian, with sudden fullness right below the waist, but to get the right shape it really needs to slope, with the fullness gradually being added the further down it gets.

The petticoat is the Truly Victorian pattern, the only adjustment being that I added a tie right at mid-thigh level to pull the fullness to the back. The bum pad is tacked on one side, and then the other side gets safety pinned to the waistband once the waist is tied. I found that the bum pad wouldn't stay up on it's own, and kept riding up in the front and falling down in the back. I'd rather have it sewn permanently to the petticoat, with the petticoat closing at the side front. But....I'm lazy, so that isn't happening.

What the item is: Natural form corset, petticoat, and pad. 
Material: Coutil, silk-faced satin, cotton sateen, muslin.
Pattern: TV 1880's pattern, and the TV basic petticoat
Year: 1870's-1890's for the corset, and 1877-1882 for the petticoat.
Notions: Metal busk, German plastic boning, 2 wider metal steels, thread, embroidery floss, twill tape, metal grommets, stuffing (for the pad)How historically accurate is it? The corset is based on an extant, and I can't think of any techniques which aren't accurate, other than the plastic bones. The stuffing for the pad is polyester, because there comes a point where you just don't care. Patting myself on the back with an 80%, although for natural form I'm a little flat in the belly area. I was wanting to make some combinations to finish this challenge off, but that's going to have to wait.
Hours to complete: 60 hours for the whole thing, started way back in July or August.
First worn: For my next project, it's been a constant on-off act, so I've already worn these undergarments for a few hours at a time maybe 8 times.
Total cost: $80; satin was expensive, coutil was stash, busk and boning was new, I had to buy a new grommet-setting kit because I was tired of the size 0's so I'm counting that as part of the cost. 

By the way....if you see any black galloon beading lace....LET ME KNOW. I searched high and low for something close, to no avail, and I wasn't willing to settle since it seemed like a simple request. 

Friday, January 26, 2018

1820's Undergarments

This technically counts towards the Historical Sew Monthly, so I guess I'll start there. It's kind of lame, so stick towards the end of the post for the real coolness.

This undergarment ensemble really needed a chemise. A basic Regency chemise is typically square necked, either high or low, with straight sleeves and a gusset in the underarm. I have one of those already, BUT I chopped the sleeves off once I decided I wanted it to be invisible under my sheer dresses. 

I've really been enjoying Cassidey Percoco's Regency Women's Fashion book. The dresses themselves aren't spectacular in my opinion, but that is what makes them so perfect as the base for whatever design you want. Just comparing to Janet Arnold, which are iconic in their own right, a lot of her dresses are designed around specific elements that you can't leave out. Anyways, a chemise pictured in their is almost EXACTLY like the ones I've drafted from the free pattern from the Sewing Academy. 

Except with a puffed sleeve. Enter a Re-do, from a chemise pulled the stash. See, I said it was lame! The holes from the original plain hem are still visible, although after a washing maybe not. 
This is the before, in its wrinkly state.

After is way cuter!


The Challenge: Mend, Re-Shape, Re-Fashion
Material: Cotton muslin
Pattern: Self-drafted using The Sewing Academy Pattern, modified to match the 1820-1840 one from Regency Women's Fashion


Year: 1820-1840
Notions: Thread
How historically accurate is it? Since almost the exact measurements are comparable to a pattern taken from an original, the shape is very good, although sewing machines weren't invented yet and it's done completely by machine. I'd give it an 80%. 
Hours to complete: 1 for the re-shape. 
First worn: For pictures, 1/26/18
Total cost: Nothing


For a complete 1820's undergarmnet wardrobe, a few things are needed:

-A chemise
-A corset, typically corded during this era, with minimal waist shaping but with a high bust and straps
-A petticoat, stiffened at the bottom with plenty of fullness to the back, and relatively smooth in front. These were made like earlier Regency petticoats, in that they need either straps or a bodice to hold the whole thing up. This is mainly due to the fact that the corsets are smooth all the way down, and without a well-defined waist it won't stay up. Whether or not these need to be layered to get the correct silhouette is yet to be determined; usually the actual dress on top was padded at the hem to hold it out, so I'm thinking I may be good with the one if I dip starch it. 

The exaggerated A-shape with the cording is very particular to the 1820's. 1830's petticoats have more of a bell shape with more fulness at least coming to the sides, and layering of petticoats to get the right amount of poof. I searched other blogger's websites for how they went about 1820's undergarments, and let me tell you folks, there ain't much. Whenever the question is thrown out about which era is the least represented, people always say, "1830's!" or "1840's!". That's because they forgot about the 1820's. So what works and what doesn't in terms of undergarments is only partially tapped territory. My thanks to Annaliese of The Young Sewphisticate and Quinn from The Quintessential Clothes Pen for providing ideas for 1820's undergarments. Per Quinn's suggestion, I decided that sleeve plumpers (AKA, croissants for your arms) aren't neccesary for 1825, as the sleeve done up in taffeta can hold it's own shape.

Mine is based on an example in the V and A; I haven't researched these extensively, mostly because this one was exactly what I was looking for! It's hard to see in the picture, but through other detail shots you can see that it has straps, and that it has 12 rows of cords, sewn at intervals. I couldn't figure out why it had that seam at knee level, although I figured it out halfway through the project. 
1820-1829 Petticoat from the V and A

The pattern was drafted using just the skirt part of another pattern in Cassidy Percoco's book. Looking back, this pattern wasn't perfect for this, just because the front panel needs a little more shaping a little closer to the front, rather than way back at the sides where the next panel joins. The person who originally wore this was at least 6'' smaller, and I didn't realize this when I first started. As a base though, it's fine. 

There are two different ways you can do cording: the sandwich method, where you sew a facing to the back and the cords in between the layers, or the tuck method, where you iron your fabric like you're sewing a tuck and then squish the cord in. Because the panels are A-shaped, I opted for the tuck method, just because I wasn't envisioning a facing on a diagonal panel. This actually ended up being really frustrating, because ironing on a curve is annoying and I just sort of stopped caring if the seams lined up. I was ironing yet another tuck when I realized: the extant petticoat was made with the cords sewn into a long rectangle of fabric, and then sewn onto the bottom of a short A-shape petticoat. This was a forehead smack moment, and I wish I had thought of it sooner. Oh well, I'm still really happy with the shape of it, and it lays nice and flat without any shirring.


This corset I've had for maybe 2 years now, and this is it's first blog appearance since it's been finished. It's not much to look at, in all it's flossed-in-two-colors laced-closed glory, but it's very comfortable and gives me the shape I want.

Stay tuned, I have a really cool announcement in the next few days!

Wednesday, March 29, 2017

HSM #2: 1863 Ballgown Reproduction

Photo credit: My sister Camille! We're just discovering that she has an incredible eye for creative shots.

Whew, this project was supposed to be a quick bodice, and it turned into a 30-hour ordeal, complete with handsewn eyelets and a total of 4 different tries of the pleating down the front.

Short backstory: I bought this green plaid silk at a screaming deal in the fall of 2015. I only bought 6 yards (54'' wide) because I was short on money, but I really wanted the fabric. Fast forward to summer of 2016; I couldn't believe that I had managed to get an entire dress from 6 yards, with some leftover! Everyone who makes 1860's dresses recommends purchasing 7-8 yards. I was even able to match the plaid.

Fast forward again: It's 2017, and I want a new ballgown. As much as I love the red one, it's soooo heavy, and it was never fit me very well (my absolute first try at darts). I've lost 20 pounds accidentally in the last year, and I knew that I just didn't want to wear it again. So I pulled out the leftover fabric and checked to see if the pattern pieces would fit. Just barely...

I managed to cut out all the pieces exactly the way I wanted them....except the sleeves. There was no portion on my fabric that was big enough even to fit the sleeves on, much less to make sure they matched! So the sleeves are pieced, but I positioned each pieced part to fit about where my true armpit is (as opposed to the rotated underarm seam). 

On my last darted bodice dress (the day bodice to this ensemble), I fitted the darts with the bodice inside out. Now, it's come to my attention that I am a little lopsided (just a smidge). Can you see how this doesn't work out? 1/2'' smaller on one side, and with the dart pinned correctly on that side and then flip it right-side out, that smaller darts are now on the larger side. Duh. No wonder I've always been so confused as to why the center front isn't exactly in the front! These darts turned out so well, thanks Mrs. Clark!
Camille: "These lines right here are cool!"
Me: "What lines?"
"I mean seams."
"You mean the darts?"
"Yeah, those things!"

So this dress I tried pinning it with the right side out, then marking the seamline on the inside and flipping it around. With this technique, I also discovered that I always thought the seam of the dart had to be straight. But when you stop and think about it, it makes no sense to always make the darts straight. 

My normal way of boning is to just turn the dart into a casing and shoving the bone up the darts, but with a dart that curves at the top, the entire excess wasn't laying flat at all. After poking around, I found Jennifer Rosbrugh's article on historical boning, using 1860's original ball bodice's as examples. Bingo! So I sliced up the center of the dart, cut all the dart excess off (gulp!) and pressed them open. Then I whipped casings on by hand, centering them over the seam instead of off to one side.

Confession time: I have always had this mindset that I should make each and every seam as available as possible for future modifications, including darts. So up until now, I've always left the dart excess alone, even though it's a pain because all of my darts are HUGE. When I was at Costume College, I attended a class on 19th century bodice construction, and in the class the teacher taught that they never ever pushed boning into the dart. Well, I raised my hand and, a little bit timidly asked, "What if I want to keep the dart excess, instead of cutting it off?"

"Huh?" The teacher wasn't following me.

"You know, in case I want to adjust it in the future?"

"WELL WHY WOULD YOU WANT TO DO THAT???" She was looking at me like I had just sprouted cabbages from my ears. I kind of wanted to curl up and die. I don't know why the question was so preposterous to her, it was perfectly valid, but I was embarrassed enough that I didn't explain my reasoning. Reading between the lines: the real reason I have never cut off the darts is because I know I can't possibly have a 23'' waist forever, and it seemed reasonable to me that anyone who lived in the 1860's might have had the same concern.

I've since learned that certain fabrics like silk don't easily forget thread holes that have stress, so moving a dart may not work because the lines from the old darts will still probably show. That being said, it is still  possible; I went to my local museum to look at a few original 1860's dresses, and one of them you could clearly see the old dart line, and they had moved it over about two inches to the front. You couldn't even tell from the outside! But if your darts aren't perfectly straight, they may not lay well if you don't at least clip into them. Either way...you most likely will be making the excess unusable.

I wasn't originally intending to do a reproduction, but it felt like a waste to not do something that is at least similar to this dress that is in the Museum of Fine Arts in Boston. As much as I like this dress....I don't like bows. Not even a little bit. So I dropped the idea of a reproduction, and posted a picture of the blank dress on a Facebook page I'm a part of, the Civilian Civil War Closet, for ideas. It was a little overwhelming, but I also got some good ideas. But 99% of the suggestions were....bows. "Bows on the shoulders!" "Put a bow on the rump!" "Don't skimp - use ALL the bows!" Other suggestions included fringe, beading, contrasting flowers, lace, a bertha and ruching/pleating. So basically any type of bodice decoration ever seen, ever. But I was surprised that so many people encouraged the bows. So whether this counts as a reproduction I'm not sure.

The trim fabric is a matte polyester satin; I was planning on using cream-colored dupioni from Joanns, but they don't sell it anymore! This makes me mad; dupioni is always a nice backup for things like nicer linings and trim. The matte polyester is actually pretty nice, it doesn't have a crazy poly-sheen. It does add a surprising amount of weight to the dress, though. Originally I had a 4th bow sewn right onto this connecting tab in the back, but it was so heavy it drooped, so I ripped it off.

I used the Truly Victorian 1860's Ball Bodice pattern. This was my 3rd time using it, and I definitely recommend it, but a mockup is important. The main bodice turned on nice on the first try, but the sleeves and sleeve lining were a little out of proportion. The pattern also comes with instructions for 3 loop bows. Basically, you sew two semi-large rectangles into tubes which become the loops held together by a small strip for the middle. Because at this point I was still making up my mind, I went ahead and made two bows and hesitantly pinned them on.
TV 442

They were so cute! Normally - I hate cute. It's a word I've despised being described as, even when I was little. But they are just so perfect for the dress. So the bows on the shoulders are detachable, and underneath are small smooth strips covering the join of the pleated part on the shoulder similar to the back detail.

Oh yeah...and the reason this qualifies for this challenge:
(The first bodice made to go with this skirt)


Item: 1863 Ball Bodice

The Challenge: Re-Make, Re-Use, Re-Fashion - this is a little of all three things. The skirt is re-used from a day dress and this is the second bodice to go with this skirt for a different look.

The Material: 100% silk taffeta, lined with cotton muslin, and eyelets stabilized on the back with cotton sateen. Also batting for pads. The bows and pleated trim are a matte polyester satin (nobody shoot me!).

Pattern: Truly Victorian 1860's ballgown pattern

Year: 1863

Notions: Artificial whalebone, plastic zip ties, cord, thread, hooks and bars, gros grain ribbon in the drawstring at the neck, 1/8'' ribbon for lacing.

How Historically Accurate Is It? This might have gotten close to 100% had I not used a synthetic for the trim. And obviously plastic isn't historically accurate, but steel boning just does not work with my figure.

Hours To Complete: 30

First Worn: For pictures, and then to the Victorian Ball on 3/25

Total Cost: Taffeta was a lucky leftover, so the total cost of $16 was for the satin trim.

Friday, June 3, 2016

Historical Sew Monthly #5: Holes

I was originally planning on finishing my Regency corset for this challenge, but an unexpected commission came up. So I made an Edwardian riding habit shirt instead!

This friend of mine competes her Gypsy Vanner horse in shows around the Northwest, and needed something to go under her riding jacket (for those of you horse-deprived people here is a good example of a Gypsy Vanner) Now, this particular riding jacket (sorry, I don't have pictures) has a much deeper V than your typical historical riding habit, with the point coming down to an inch or two under the bust. In my search to come up with what I was going to make, that deep point narrowed down what I probably would have made if the point was only a hand span below her neck, or something like that. Because of the V, I couldn't do any kind of stock-tie/cravat/whatever you call it; the reason I didn't feel like any of those would work was because whatever it was, it would have to stretch way down to fill in the point and wouldn't look right. The collar refuses to lay flat when it's all folded up.

So I went with just a plain habit shirt and dressed it up with some pretty buttons that I bought at Hobby Lobby. It's based on rather ordinary chemisettes, except for the stand up collar and the fact that the muslin is probably not the quality it should have been. Yes, I starched it to death, so it was all nice and crisp but as soon as you start handling it it loses it's crispness. It is also probably a touch longer than most other chemisettes, which don't usually have to reach down below the bust. And yes, I hand-sewed those eyelets so the ribbon could pass through.

I'm pretty proud of my drafting skills though, I did that part myself. I had to mess with the neck angle quite a lot to get the neck just right, but other than that it was pretty easy. I thought the collar would need some stiffening strip in it like interfacing, or canvas, but in the end it was short enough (only a tiny bit more than 1'') that it didn't really have any problems staying up. It's just a strip of bias, folded in half with the edges tucked in.

Speaking of tucks, I originally planned on having three on each side. Even as I sewed them in, I couldn't help but wonder what was going to happen to the neck curve. Alas, the third tuck was a bit much and ruined the neck shape. So I went with two and trimmed off the third tuck allowance.

The buttonholes in particular were VERY troublesome. I have yet to get my machine to work in that area, so I asked a friend to come over to her house and use her high-tech sewing machine to sew my buttonholes. Apparently no technology can cure the fact that her machine is....temperamental. I spent maybe 2 1/2 hours on the first three buttonholes; the rest went fine, but 3 1/2 hours for machine-stitched buttonholes is outrageous.

What the item is: Edwardian Riding Habit Shirt

The Challenge: #5 Holes

Fabric/Materials: Cotton muslin

Pattern: Drafted myself

Year: 1900-1915?

Notions: Buttons, ribbon, thread, fray check

How historically accurate is it? Not a clue; there is nothing inaccurate about the shape, although machine-sewn buttonholes and fray check aren't accurate. It looks great though!

Hours to complete: 10

First worn: 6/4


Total cost: $2.50

Tuesday, May 24, 2016

Challenge #5: Holes Update

Even though it may seem as though I've dropped off the face of the blogging planet, my current project is a Regency corset. Yay! It's come along a little on the slow side; at first I thought the cording would be fun, but after the first panel....yeah, not so much. Actually, I do enjoy the cording, but it took me a little while to figure out what the best size cord channel was. After much pulling, yanking, and hand cramping, I finally ripped out and re-stitched a few from 1/8'' channel to 3/16''. What a difference!

Living in a dry climate, my air-erasable pen disappears REALLY fast. On my first panel, I was going along, taking my sweet time tracing and getting it all perfect. As I started pinning the pieces together to start sewing, I saw that the very first lines I had drawn were already disappearing. AAAHHH! So I sewed like the wind, and that was part of why some of the channels ended up so tight. But dang, they sure turned out nice!

On the next back panel, I had the sense to go through and sew the middle seam of each set of cords. Then it didn't matter too much if the lines were erased because I had a better idea of how far away to sew it. I also didn't try to force the cord in and went back and re-sewed a few. It was worth the time to re-do a few. Plus an entertaining story put me in a better mood to fix it, vs. watching Lord of the Rings which I was only partially paying attention to what I was doing. Hence the not perfectly even embroidery, lol. The sun has yet to cooperate with my tracing efforts, so the front has not even been started with the cording. 

Right now, I am in a bit of a slump because I got my wisdom teeth pulled two days ago. My brain is totally unmotivated with the pain-killers, so I'm guessing Historical Sew Fortnightly entry will be a little late. The dentist recommended a hot compress; this little gel pack was the only thing Walgreens had. I have named him Penguino, and he has been of great comfort to me in my time of suffering.


Plus I've had a friend ask me to make a few small items before the first week of June, so that is also slowing me down a little. She rides her horse side-saddle and enters in small competitions with her gorgeous Gypsy Vanner; she enters in costume classes and has a gypsy costume, but she wanted a headscarf that matched her outfit. I didn't take a picture of the finished product, but here is a picture of the pretty trim.

Also, last minute they changed the open 'costume class' to Edwardian side-saddle class, and needs a habit shirt to go under her riding jacket. So far, I've got a couple ideas.

A. A chemisette with a seperate stock tie. This is today a part of traditional dressage and fox hunting attire. She would need to find a stock pin, either fancy or plain. This is my favorite in the way it looks, as it isn't too complicated to tie and is acceptable in the modern show ring.

B. A chemisette with an actual cravat. Probably my least favorite option, as they are more complicated to tie and she doesn't prefer anything that rides up too high on the neck. Also, they are not very feminine. I know the cravat is hard to see in this fashion plate, but up close I am not entirely convinced that isn't a man.

C. A chemisette with a jabot, either lace or muslin. I think this might be the easiest option to make and wear as I think I can make them one piece, although the ruffles might be too fussy. I also don't think they are particularly Edwardian; when I think of Edwardian attire I think sleek and traditional (as far as riding habits), and jabots are really a Colonial garment. The below jabot is listed on the MET as circa 1900. Ok, so maybe it is an option. But I think I would like to avoid ruffles.

Tuesday, April 5, 2016

Historical Sew Monthly #3: Protection

I know, a chemise is not the most original idea. But...a chemise does protect your skin from the potential burn that corsets can give. And it also protects your dress from sweat. So protection on multiple parts! I know, only one picture, but it is only a chemise after all.

I used the Laughing Moon pattern. I loved this pattern! It makes me question why I bother drafting all that stuff myself and working without instructions. I may just buy patterns as often as possible from now on. I also took the time to cut out all the little notches that you use to line stuff up. Let me tell you, it made a huge difference! It also probably saved me time, as I didn't have to pull the pattern pieces back out to mark where those notches were after the whole thing was sewn together.

This is a Regency style chemise, and the pattern is based off of an original; the straight line style with a drawstring and gussets in the armpits is appropriate pretty much between 1795 and 1830, maybe even into the 1840's. There was something really nice about not having to gather something to something else, and I would take the gussets and drawstring over gathers with a set band any day.

For Christmas I received Jennifer Rosbrugh's Regency corset and chemise class, so I also had the video tutorials to go along with it. I really appreciated her clear instructions on the gussets, that was really helpful; without them, I probably would have had to rip out the seams two or three times before figuring it out. Which brings me to my next point:

I HAND SEWED THE WHOLE THING! And it only took a couple afternoons!

So yes, if I wanted I could say this is 100% accurate since sewing machines weren't invented until the 1840's. But why bother since the chemise is the undergarment which will be least seen? I don't know, I just love hand sewing. Actually, my flat felled seams were a little on the sloppy side; I've done them before much neater. Next time I use this pattern, I'm going to use a smaller seam to make tidier flat-felled seams.

What the item is: Chemise

The Challenge: Protection

Fabric/Materials: 100% cotton muslin, the Sew Essentials brand (basically the cheapest brand, but it irons up a lot better than whatever brand I used last time).

Pattern: Laughing Moon #115

Year: 1795-1830

Notions: Thread, ribbon for drawstring. 

How historically accurate is it? 95%; completely hand sewn and the pattern is based off of an original.

Hours to complete: 10 hours of handsewing

First worn: Not yet

Total cost: $5

Tuesday, February 9, 2016

A Quick Update

For the February challenge, I've been working on my green gigantic plaid day dress. It's been a bit slow just because my schedule has been busy, but I have made some progress and hope to finish it by the end of February.

It was coming along awesomely, and it felt like I had performed some sort of sorcery when my darts came out perfect in the first try (whaaaattt?) OK, I'm not thrilled about the direction of the plaid in the front, but I'm thinking the black velvet trim I bought will distract enough to not notice terribly. But then - wait  - what...


...is...

THAT?!?!?


So yeah, I've got a funny neck bubble. Today I'm going to rip out the neck binding and try to take it in right there. I can't for the life of me figure out why it would be on the one side and not the other. It makes a funky spot in the back that won't lay flat. Other than that, I'm pretty proud of my fit. Here is the back; you can kind of see the neck thing I'm talking about. Again, I'm pretty sure I had not idea what I was doing when I cut out the plaid. I tried to be thoughtful in the placement, but I'm not sure how much it worked. 


Anyhoooooo, I also have officially signed up for Costume College! Yay! Who else is going? And who knows how to pack a hoop in a suitcase? My friend Tiana over at Adventures in Costuming and I are going to be thick as....well, maybe not thieves, but pretty thick! 

Friday, January 22, 2016

An Organization of Ideas

Okay, so I mentioned some of my upcoming plans for 2016, and I thought I would organize the order I might make them in and what exactly each thing might be. My main goal is to make a dress from any other decade than

January - Procrastination: Check!

February - Tucks and Pleats

I am almost done with the mockup for the giant green plaid, so that will be finished in February. The skirt has inverted stacked box pleats.

March - Protection

I was thinking maybe several chemises, because they protect the dress from sweat. At this point I'll be finishing my Regency stays and I don't think that would work; a small project might be nice. I will also be making a Regency dress that I mentioned in an earlier post; hopefully that doesn't interfere with that. A corset is also another idea.

April - Gender Bender

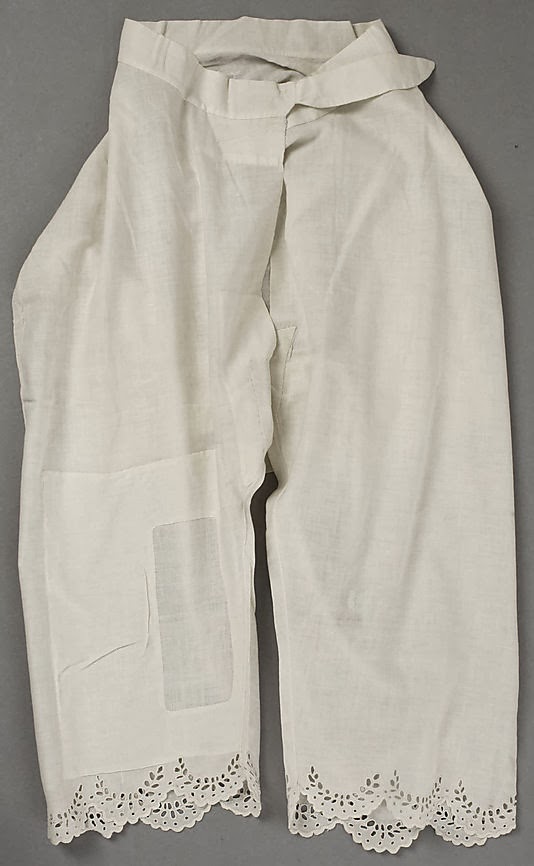
Oh, oh oh! I just figured it out! I was staring at the Dreamstress' idea/description, and I remembered that drawers were at first shocking because they were a man's garment. Maybe a pair in the earlier form, the kind that were two seperate legs.

May - Holes

Honestly, anything with a button hole would work. I need to make a corset for a friend, and this could be a good opportunity what with the grommets in the back.

I actually also need a new fashion bonnet, and netting which is used quite a lot is about as holey as it gets.

June - Travel

Because I'm probably going to Costume College in July (the very next month), I may choose to be inspired by traveling to LA. I was planning on wearing my completed green plaid to the gala event, but it's going to be the middle of July and awfully hot I'm sure. A nice Regency dress would be waaaayyy cooler. A pretty cap or beaded hairnet for indoors would also be nice for that particular event if I don't have time to make an entire dress. Plus, duh, time travel!

July - Monochrome

I just bought the Bustle dress petticoat pattern from Truly Victorian; I don't have any intention of making it any time soon, but this might be the month to actually make it. The Natural form one isn't pictured, but this is the pattern.

August - Pattern

I'm confident I'll come up with something. Personally, I would love to eliminate plaids. When I think of pattern, I think of printed cloth, not a woven pattern. Sadly nothing comes to mind, but I love finding period prints at the local fabric store! Now that I think of it, our local reenacting group is in need of some loaner clothes. A generic size girls dress may be in order, with a yoked bodice or something of that sort.


September - Historicism

My favorite!!! And I would like to point out that that was my idea. Anyway, I think this may be a good time to get cracking on that bustle era dress. The big swag in the front and the pleated underskirt remind me of colonial style Robe a la Polonaise. The pattern that I'm buying actually has the Watteau back, which was like a throw-back Thursday of the Robe a la Francais. Sadly, when I actually start the bustle dress will most likely be dictated by when the class starts, and I have no idea when that will be. If that isn't going to work, then I have no problem making a Neo-classically inspired Regency dress if it hasn't already happened.

Below is the Robe a la Polonaise (dress with an overskirt looped up over a underskirt)

The pattern I plan on purchasing, although I was planning on using the fitted back on the right.


Robe a la Francais (Watteau back, or sack-back dress)


Neoclassically inspired Regency gown


October - Heroes

There are plenty of costumers I admire, although I would be shy to admit that I made anything inspired by someone else. In terms of historical heroes, I've really enjoyed reading about Angelina Grimke, but as far as costuming goes I think I would rather be inspired by a fictional hero! (Jane Eyre, anyone?)

November - Red

I love red! I still have a piece of red silk that might be enough for a Regency bonnet, unless I've used it by then. Actually I've tried to avoid red because I already have two dresses in dark red, but I couldn't help but think of making it into a bustle dress. I bought this pattern 2 months ago, just because I needed to get my order over $50 for free shipping. Whhheeeee! I'd much rather have two patterns than one pattern and pay for shipping. When November approaches I'll probably have a better idea of exactly what I want.


December - Special Occassion

I've been thinking of making a new Victorian ball dress; there is a ball every year in March, and I've learned that making the dress with no deadline (like I'm doing now) is just the best. I do have one in the aforementioned dark red, but it is so heavy it feels like I sewed a couple phone books into the hem. So I might make a new one and save it for a couple months.