Showing posts with label Corset. Show all posts

Tuesday, February 27, 2018

HSF #2: 1880's Reproduction Corset

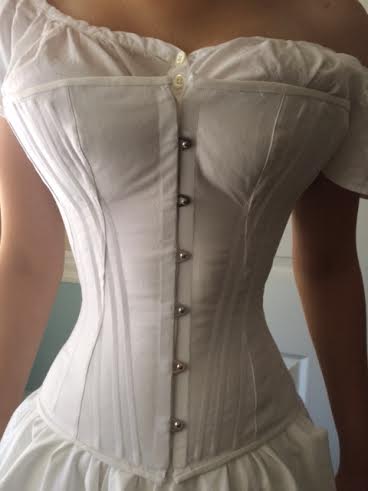
The goal with this corset: to make an awesome corset, no skimping on the flossing, all the way through, that could work under an 1880's dress.


I wanted to not get too crazy with color choices, so I looked around at all the corsets within this time frame. Overall, I really liked this particular corset because the seam lines were very comparable to the Truly Victorian pattern I already had. I copied the exact boning design; the back diagonal section I had to fudge a little because my corset overall turned out longer, and I think I may be a little smaller, so the exact angle is different. In fact, it didn't turn out the same on both sides, because I finally succcessfully got both sides even; so the one side has 6 diagonal, and the other 7.


c. 1880-85 Corset in the Royal Ontario Museum


After reading some articles and watching some videos, I decided to try roll-pinning. Roll-pinning is the theory that, if you pin something on a flat plane, and wear it on a curved sphere, the outside layer will be too small, and the inner too big. This process involves pinning the two layer together on a sphere; in this case, I used my larger pressing ham. His name is Hammie. The two layers were then hand-stitched together. It was a lot of work....because I haven't done more corsets, I don't know how it would have turned out if I hadn't pinned it like this. But overall, it lays pretty well without many wrinkles. So, success, I guess?

I also decided to try putting the seams on the outside (why?), and covered it with the boning channels. As I was constructing it, I wasn't sure why I picked that, but later it ended up coming in handy.
This is the closest I've come in corset-making to an even back.

Once the grommets, boning channels and busk were in, I tried it on. It had been like 6 months since the mockup had been worn. Initially, it took some time to figure out the best way to lace it up; the first time I laced it too tight in the ribs. Also, I stabbed my hands three times really hard because I pinned the bones in rather than baste across the top. Double hole for each stab, with the pin going in and out and I had to carefully draw it out. So I was hurting and frustrated. After coming back to it with more patience and time (and the bones basted in), I figured out the best way to lace it.

I only have two small regrets with this project that can technically be fixed:

1. The bust shaping. To fix the bust, I ripped the front casing off halfway and added in a really tiny gusset to round it out a little more. Once the seam allowance was trimmed and the casing back on, you can't even tell it's there! It's not perfect on one side, but better overall. Still want to perfect that.

2. I would never have even thought of the wider bone, except for the original, so I thought I'd try it. Whoops....didn't realize that exact seam line curves forward quite a bit, and it hits right at my hip bones. So the tighter I have it laced, the more the bone tweaks, although the hip bone thing is a little uncomfortable, but not as big a problem as I thought. Technically, I could remove the bone and leave the channel (it needs to cover the seam) and re-angle it so it's a little closer to my actual side, and more upright.

There are a few areas of this project that mystify me a little bit: the natural form tummy, and hip spring. Back in July, I had sort of a hip-spring revalation after adding gussets to my older corset. Wow! What a difference! So comfortable and attractive! I no longer looked top-heavy. With the old corset gussets, it gave me a lot more spring out the back. With this particular corset though, it gives me more spring out to the side, and more flatness in the back. Huh. Some people are amazing at that balancing act; I'm still trying to figure out if perfection is possible when you have less body to work with?!? Like, do I have to pick between the back or the side? And if I try to balance between the two will it not be so extreme and not even be worth trying?

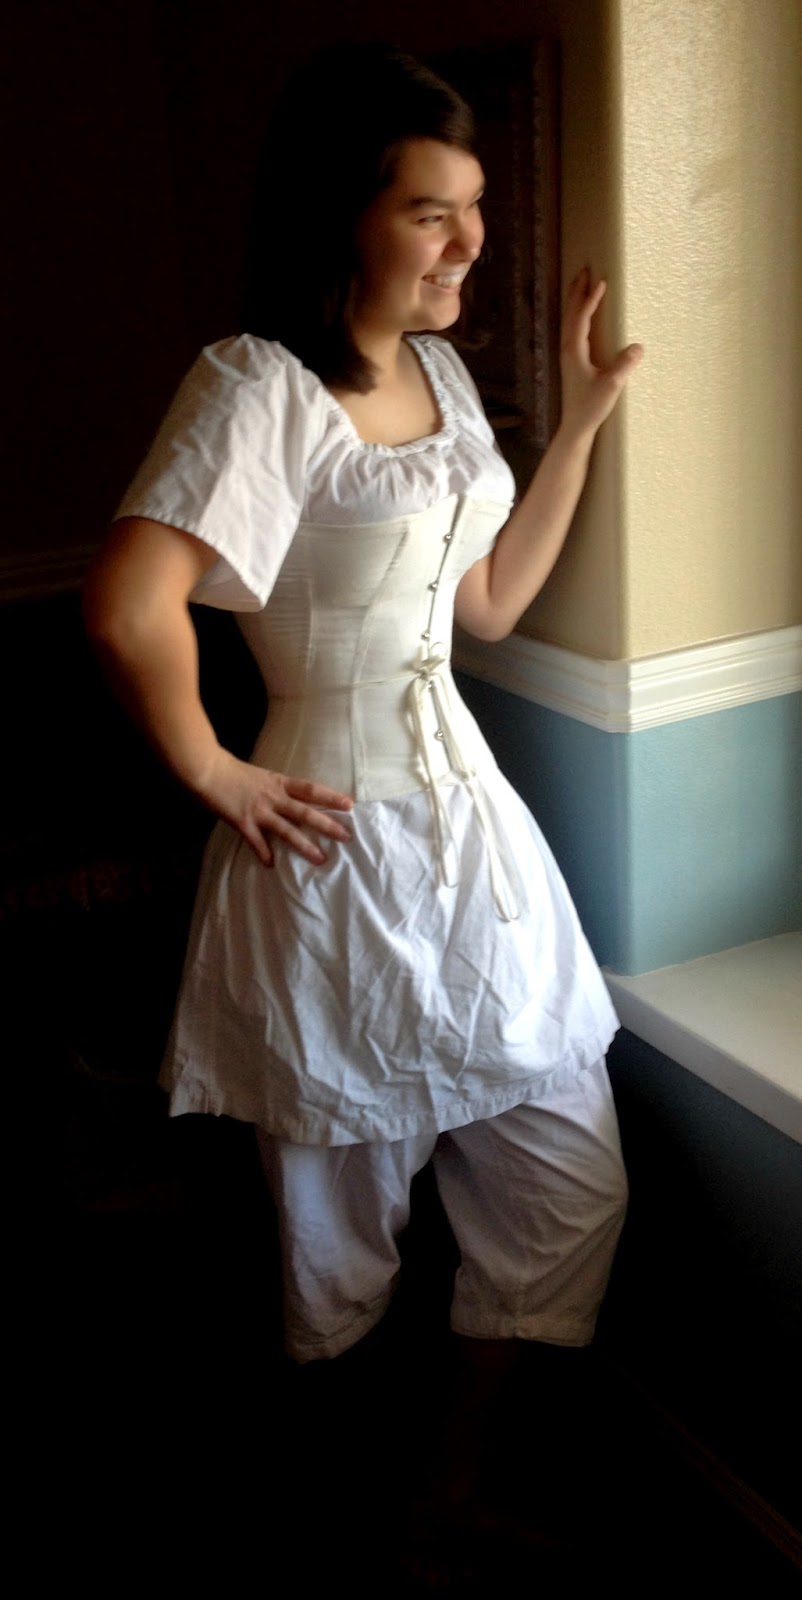
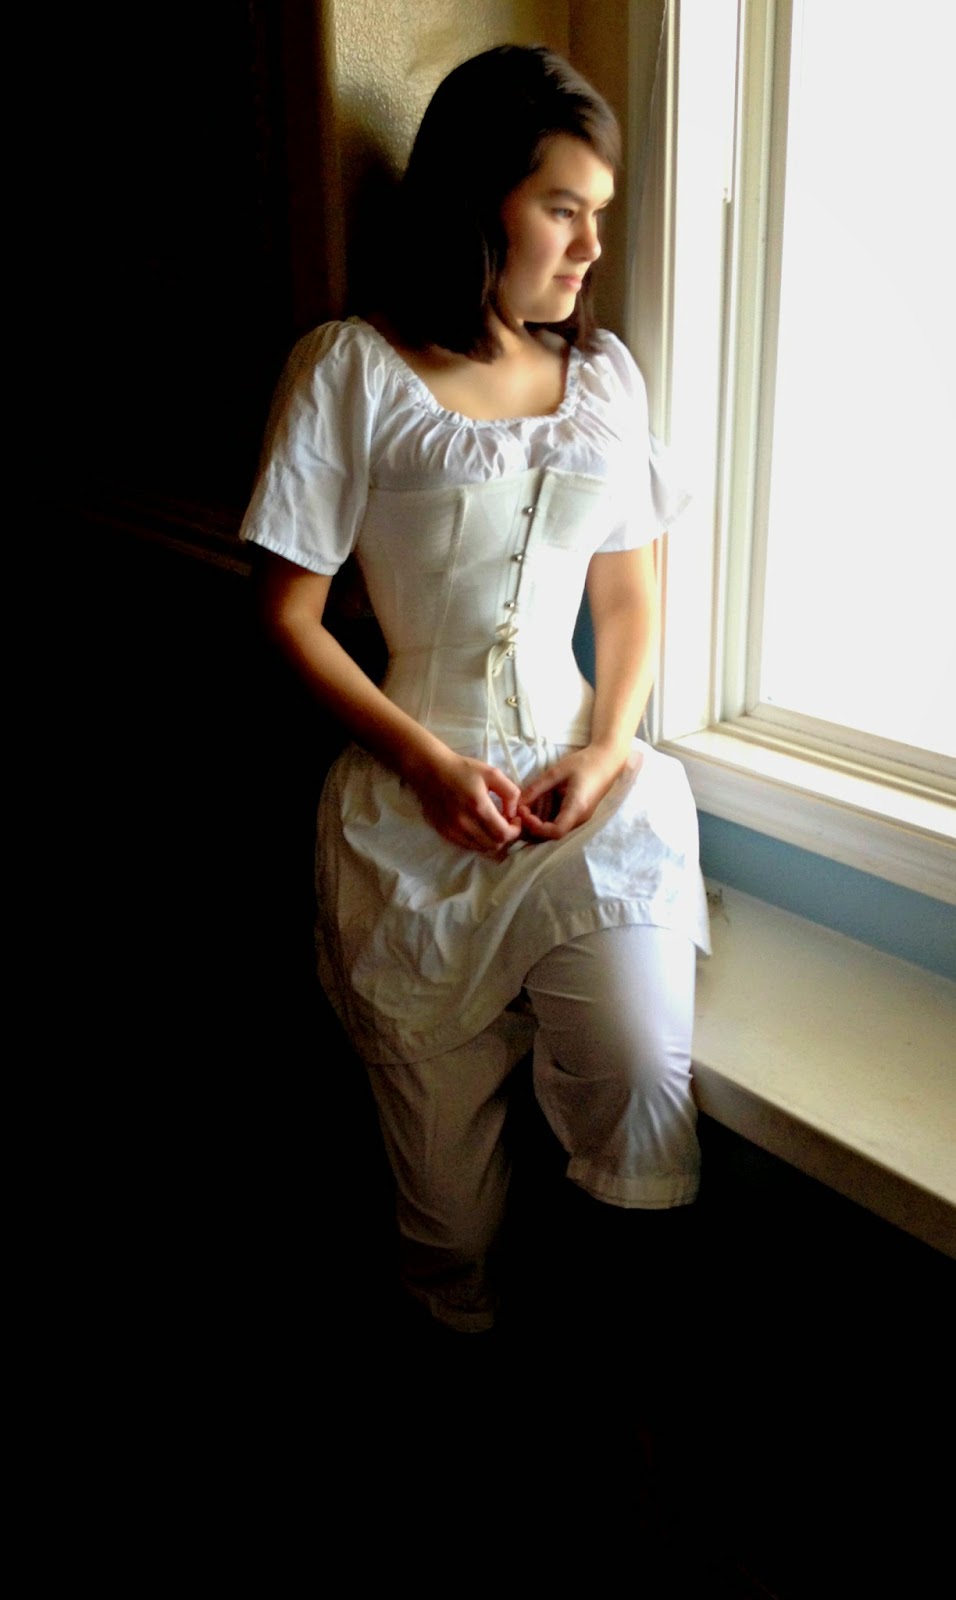
The other undergarments made to go with this are a basic natural form petticoat, and a bum pad. Initially, the pad was made to wrap all the way around my hips to the side, but I decided that I was hippy enough without any help. Actually, I wasn't even going to make a hip pad, but after the petticoat was made it was clear that the silhouette was really, really sad without it. It took several tries to get this the right shape; I'm so used to mid-Victorian, with sudden fullness right below the waist, but to get the right shape it really needs to slope, with the fullness gradually being added the further down it gets.

The petticoat is the Truly Victorian pattern, the only adjustment being that I added a tie right at mid-thigh level to pull the fullness to the back. The bum pad is tacked on one side, and then the other side gets safety pinned to the waistband once the waist is tied. I found that the bum pad wouldn't stay up on it's own, and kept riding up in the front and falling down in the back. I'd rather have it sewn permanently to the petticoat, with the petticoat closing at the side front. But....I'm lazy, so that isn't happening.

What the item is: Natural form corset, petticoat, and pad. 
Material: Coutil, silk-faced satin, cotton sateen, muslin.
Pattern: TV 1880's pattern, and the TV basic petticoat
Year: 1870's-1890's for the corset, and 1877-1882 for the petticoat.
Notions: Metal busk, German plastic boning, 2 wider metal steels, thread, embroidery floss, twill tape, metal grommets, stuffing (for the pad)How historically accurate is it? The corset is based on an extant, and I can't think of any techniques which aren't accurate, other than the plastic bones. The stuffing for the pad is polyester, because there comes a point where you just don't care. Patting myself on the back with an 80%, although for natural form I'm a little flat in the belly area. I was wanting to make some combinations to finish this challenge off, but that's going to have to wait.
Hours to complete: 60 hours for the whole thing, started way back in July or August.
First worn: For my next project, it's been a constant on-off act, so I've already worn these undergarments for a few hours at a time maybe 8 times.
Total cost: $80; satin was expensive, coutil was stash, busk and boning was new, I had to buy a new grommet-setting kit because I was tired of the size 0's so I'm counting that as part of the cost. 

By the way....if you see any black galloon beading lace....LET ME KNOW. I searched high and low for something close, to no avail, and I wasn't willing to settle since it seemed like a simple request. 

Friday, January 26, 2018

1820's Undergarments

This technically counts towards the Historical Sew Monthly, so I guess I'll start there. It's kind of lame, so stick towards the end of the post for the real coolness.

This undergarment ensemble really needed a chemise. A basic Regency chemise is typically square necked, either high or low, with straight sleeves and a gusset in the underarm. I have one of those already, BUT I chopped the sleeves off once I decided I wanted it to be invisible under my sheer dresses. 

I've really been enjoying Cassidey Percoco's Regency Women's Fashion book. The dresses themselves aren't spectacular in my opinion, but that is what makes them so perfect as the base for whatever design you want. Just comparing to Janet Arnold, which are iconic in their own right, a lot of her dresses are designed around specific elements that you can't leave out. Anyways, a chemise pictured in their is almost EXACTLY like the ones I've drafted from the free pattern from the Sewing Academy. 

Except with a puffed sleeve. Enter a Re-do, from a chemise pulled the stash. See, I said it was lame! The holes from the original plain hem are still visible, although after a washing maybe not. 
This is the before, in its wrinkly state.

After is way cuter!


The Challenge: Mend, Re-Shape, Re-Fashion
Material: Cotton muslin
Pattern: Self-drafted using The Sewing Academy Pattern, modified to match the 1820-1840 one from Regency Women's Fashion


Year: 1820-1840
Notions: Thread
How historically accurate is it? Since almost the exact measurements are comparable to a pattern taken from an original, the shape is very good, although sewing machines weren't invented yet and it's done completely by machine. I'd give it an 80%. 
Hours to complete: 1 for the re-shape. 
First worn: For pictures, 1/26/18
Total cost: Nothing


For a complete 1820's undergarmnet wardrobe, a few things are needed:

-A chemise
-A corset, typically corded during this era, with minimal waist shaping but with a high bust and straps
-A petticoat, stiffened at the bottom with plenty of fullness to the back, and relatively smooth in front. These were made like earlier Regency petticoats, in that they need either straps or a bodice to hold the whole thing up. This is mainly due to the fact that the corsets are smooth all the way down, and without a well-defined waist it won't stay up. Whether or not these need to be layered to get the correct silhouette is yet to be determined; usually the actual dress on top was padded at the hem to hold it out, so I'm thinking I may be good with the one if I dip starch it. 

The exaggerated A-shape with the cording is very particular to the 1820's. 1830's petticoats have more of a bell shape with more fulness at least coming to the sides, and layering of petticoats to get the right amount of poof. I searched other blogger's websites for how they went about 1820's undergarments, and let me tell you folks, there ain't much. Whenever the question is thrown out about which era is the least represented, people always say, "1830's!" or "1840's!". That's because they forgot about the 1820's. So what works and what doesn't in terms of undergarments is only partially tapped territory. My thanks to Annaliese of The Young Sewphisticate and Quinn from The Quintessential Clothes Pen for providing ideas for 1820's undergarments. Per Quinn's suggestion, I decided that sleeve plumpers (AKA, croissants for your arms) aren't neccesary for 1825, as the sleeve done up in taffeta can hold it's own shape.

Mine is based on an example in the V and A; I haven't researched these extensively, mostly because this one was exactly what I was looking for! It's hard to see in the picture, but through other detail shots you can see that it has straps, and that it has 12 rows of cords, sewn at intervals. I couldn't figure out why it had that seam at knee level, although I figured it out halfway through the project. 
1820-1829 Petticoat from the V and A

The pattern was drafted using just the skirt part of another pattern in Cassidy Percoco's book. Looking back, this pattern wasn't perfect for this, just because the front panel needs a little more shaping a little closer to the front, rather than way back at the sides where the next panel joins. The person who originally wore this was at least 6'' smaller, and I didn't realize this when I first started. As a base though, it's fine. 

There are two different ways you can do cording: the sandwich method, where you sew a facing to the back and the cords in between the layers, or the tuck method, where you iron your fabric like you're sewing a tuck and then squish the cord in. Because the panels are A-shaped, I opted for the tuck method, just because I wasn't envisioning a facing on a diagonal panel. This actually ended up being really frustrating, because ironing on a curve is annoying and I just sort of stopped caring if the seams lined up. I was ironing yet another tuck when I realized: the extant petticoat was made with the cords sewn into a long rectangle of fabric, and then sewn onto the bottom of a short A-shape petticoat. This was a forehead smack moment, and I wish I had thought of it sooner. Oh well, I'm still really happy with the shape of it, and it lays nice and flat without any shirring.


This corset I've had for maybe 2 years now, and this is it's first blog appearance since it's been finished. It's not much to look at, in all it's flossed-in-two-colors laced-closed glory, but it's very comfortable and gives me the shape I want.

Stay tuned, I have a really cool announcement in the next few days!

Tuesday, May 24, 2016

Challenge #5: Holes Update

Even though it may seem as though I've dropped off the face of the blogging planet, my current project is a Regency corset. Yay! It's come along a little on the slow side; at first I thought the cording would be fun, but after the first panel....yeah, not so much. Actually, I do enjoy the cording, but it took me a little while to figure out what the best size cord channel was. After much pulling, yanking, and hand cramping, I finally ripped out and re-stitched a few from 1/8'' channel to 3/16''. What a difference!

Living in a dry climate, my air-erasable pen disappears REALLY fast. On my first panel, I was going along, taking my sweet time tracing and getting it all perfect. As I started pinning the pieces together to start sewing, I saw that the very first lines I had drawn were already disappearing. AAAHHH! So I sewed like the wind, and that was part of why some of the channels ended up so tight. But dang, they sure turned out nice!

On the next back panel, I had the sense to go through and sew the middle seam of each set of cords. Then it didn't matter too much if the lines were erased because I had a better idea of how far away to sew it. I also didn't try to force the cord in and went back and re-sewed a few. It was worth the time to re-do a few. Plus an entertaining story put me in a better mood to fix it, vs. watching Lord of the Rings which I was only partially paying attention to what I was doing. Hence the not perfectly even embroidery, lol. The sun has yet to cooperate with my tracing efforts, so the front has not even been started with the cording. 

Right now, I am in a bit of a slump because I got my wisdom teeth pulled two days ago. My brain is totally unmotivated with the pain-killers, so I'm guessing Historical Sew Fortnightly entry will be a little late. The dentist recommended a hot compress; this little gel pack was the only thing Walgreens had. I have named him Penguino, and he has been of great comfort to me in my time of suffering.


Plus I've had a friend ask me to make a few small items before the first week of June, so that is also slowing me down a little. She rides her horse side-saddle and enters in small competitions with her gorgeous Gypsy Vanner; she enters in costume classes and has a gypsy costume, but she wanted a headscarf that matched her outfit. I didn't take a picture of the finished product, but here is a picture of the pretty trim.

Also, last minute they changed the open 'costume class' to Edwardian side-saddle class, and needs a habit shirt to go under her riding jacket. So far, I've got a couple ideas.

A. A chemisette with a seperate stock tie. This is today a part of traditional dressage and fox hunting attire. She would need to find a stock pin, either fancy or plain. This is my favorite in the way it looks, as it isn't too complicated to tie and is acceptable in the modern show ring.

B. A chemisette with an actual cravat. Probably my least favorite option, as they are more complicated to tie and she doesn't prefer anything that rides up too high on the neck. Also, they are not very feminine. I know the cravat is hard to see in this fashion plate, but up close I am not entirely convinced that isn't a man.

C. A chemisette with a jabot, either lace or muslin. I think this might be the easiest option to make and wear as I think I can make them one piece, although the ruffles might be too fussy. I also don't think they are particularly Edwardian; when I think of Edwardian attire I think sleek and traditional (as far as riding habits), and jabots are really a Colonial garment. The below jabot is listed on the MET as circa 1900. Ok, so maybe it is an option. But I think I would like to avoid ruffles.

Monday, September 21, 2015

Corset 2.0

Yayyy!!! It's done!

It isn't as nice to look at yet as I would prefer, especially laying flat, but it is perfectly functional and will be hopefully long-lasting. Flossing is to come! I am also really excited about the multi-era shape it gives me, being just a little longer than your typical 1860's corsets.

I found that I really liked working with the coutil, but only once I handled it a lot. At first, even coming out of the washing machine and dryer it was really stiff, like canvas. But, by the time it was done, it was much more pliable. I'm also happy that I chose to line with twill instead of coutil, because now I have a lot of coutil left over. The twill did make me pretty angry, because I could have sworn it was stretching just by me handling it...


Moving on from unhappy thoughts. The time it took to rip apart my old corset, turn it into a pattern, and fiddle with the mockup was 15 hours, a lot of which was spent getting the back straight. It's pretty straight, even though it doesn't look so in the picture. Total time to completion was 32.5 hours.

One problem which was a little weird was that the front kept making a weird bubble. Let me show you what I mean; see that funny lump just to the left of the boning channel?


I'm not actually shaped like that. It took quite a lot of ripping out the boning channels and repositioning to fix it, until finally I just went in and shaved off that bit. That fixed it, mostly. I think what happened is I was really paranoid about making sure that it was tight enough right against my rib cage, and I went a little crazy with the cupped flare, making it go more out suddenly than it needed to be. It isn't perfect, but we're getting there.

There are a couple things which I may need to go in and fix; I'm not sure yet about the front length at the top, if it's too high or not. I'll be wearing it this weekend, so I'll get an idea of how practical the entire garment is.

I got a lot of good advice from Elizabeth Clark (HUGE thanks!), and I can't even say how helpful it was!

AAnnnnd.....just because....here is a sneak peek at what I may or may not have just bought 6 yards of....


Tuesday, September 8, 2015

5 Ways to Save Money in Corsetry

I am sooo excited to be on my way with my corset. The grommets are installed, the busk is in, and just fiddling with it more before I sew the boning chanels. I tried it on, and wow! The coutil behaves completely differently, and is much more firm. I could barely get it on, and completely laced has 3'' spring (before tightening the laces, there is about 5'' of spring, so you can imagine how tight it feels when first putting it on). The mockup only had 1 1/2'', so it makes it more difficult to get on. I'm afraid I have no pictures of what the corset looks now, and mockup pictures aren't so great. BUT...pictures will be coming!

The coutil is way more stiff and thick than I thought it would be. Next time, maybe I will try the imported coutil from corsetmaking.com instead of the domestic coutil; there was only a $5 price difference. After a little debate, I decided to try making a single layer corset, but line with twill. After working with it, I think it was a good decision because my sewing machine couldn't make up it's mind going over some of the double layers, particularly over the seams.

With each corset, the price gets lower and lower. Here is some of the breakdown of what my costs are, and some comparison of how you can plan ahead and save money on your next corset by making wise purchases now. No matter how much you hate making corsets (which I don't, it's growing on me), or how long you think your corset will last, you will eventually have to make another one.

My first corset was:

$15 busk
$10 Boning
$25 grommet setting kit
$10 Cotton twill (the mockup became the finished product)

All in all, shipping is expensive, so the total was around $70-$75.

The second corset:

$15 busk
$8 boning
$25 1 yard cotton coutil
$6 cotton twill (I bought it for the mockup, but it'll also be used for the finished product)

I ordered 4 dozen grommets for a different project and used 2 dozen, so I'll have enough for this particular one and be able to consider it stash. Also, there are a couple different boning sizes I have from my last corset to use in this one that will fit somewhere in the side and back. The front in this new one is considerably longer, 2'', plus more flare vs. straight up and down. Total cost = $65

With potential preparations for a corset for someone else, I will have enough for one layer to be coutil, which is a huge savings, and I may be able to use my original busk which doesn't fit my new corset. Grommets, once you have the kit, are inexpensive in bulk. I ordered 4 dozen on Amazon last time for $8, and it's nice to have enough for more than one project.

Here are what the price is looking for the next one:

Re-Used Busk - free
Stash Coutil - free
$6 cotton twill mockup
$8 boning
$8 Grommets

Corsetmaking.com is a great resource, but their shipping is expensive for even small orders. For something like this, I will probably try The Button Baron; each boning piece is a little more expensive, but the shipping is way better on smaller orders. So, the total we're looking at for the next corset is between $25-$40, depending on whether the old 11'' busk works or not.

All in all, here is the breakdown of ways to save money:

1. One thing that I haven't had to buy is plastic zip ties for the mockup. I keep reusing it over and over, and very rarely does it get put in a finished project. That is kind of a one-time buy, if you hang on to them once you're done with the mockup. Another thing you can use for each project is a set of grommet tape; I bought eyelets from Joanns for a different project, and they were so cruddy that they are now only used for mockups. However, after tearing apart my old corset, I decided to not recycle the back panels with grommets because of the stretching and have upgraded my mockup just by switching to something I can put boning in.

2. If you and your friends are looking to make corsets, order from Richard the Thread. You must buy at least 5 yards, but the breakdown is $15 a yard all in all.
Also, I just discoverd this Etsy seller has very affordable fabric, but the shipping can be expensive for people outside the UK like me.

3. Making single-layer corsets or double layer with the inner layer being some other stable fabric is another way to stretch one yard. I also recommend that any bias strips you use to bind or make boning casings with you use something other than coutil; it has no bias stretch whatsoever and could be more of a headache than it's worth.

4. You don't need any fancy grommet setting kits, but after buying the simple kit for $25 and using the grommets from that, buy in bulk enough to make 2 or 3 corsets. You'll save on shipping, and the more you buy the less expensive they are by the dozen.

Grommets available at Vogue Fabrics

5. As far as busks go, there isn't really any place to get them for less than $15, and the best bet is buy from either the same place you buy boning or fabric. If you have an old corset, reuse it if you can. My friend Tiana over at Adventures in Costuming found an old corset at a thrift shop and reused the busk. I go thrifting all the time, but I never think to look for sewing supplies.

If you buy boning, it never hurts to buy a couple extra bones in case you want more. If you don't use them, they can be used either in a mockup or in the next corset.

Know of any other good tips to save money in corsetry? I'd love to hear them!

Monday, August 10, 2015

Upcoming, Updated Projects

Here are how the voices in my head sound:

(Practical me) "I'm going to have to rip apart my old corset and start over."

(Sentimental me) "Nooooooooooooo!"

"Oh, you mean that old thing that has stretched into non-existence?"

"What do you mean, that old thing? It took me a hundred hours of fitting and was finished 6 months ago!"

I can't even wear it anymore, but letting it go was pretty sad. And now it lays in pieces on the table.

Not to worry, the Frankencorset's legacy lives on. The ripped apart pieces became a mock-up for little baby Frankencorset, which may get renamed into something nicer if the finished project turns out. (Frankencorset is not my own terminology, but I thought it was pretty darn creative!)

Here is the original list of problems which must be solved:

-A longer busk, as the first cut right into my gut and caused horrible stomach-aches straight after eating.
-One side modified, as two of the same side makes it sit crooked on my back.
-More taken in at the hips, so that the spring in the back is straight up and down.
-A more durable fabric, as one layer of twill wasn't enough.
-More boning in the front, and more flare in the angle they are sewn in. Straight up and down causes the boning to not sit right.

In my first stages of making it, I could never have forseen how it would not hold up. I thought it would at least last a year, but now it is basically able to lace closed.

I cut apart the old corset, and traced the outline into a pattern, and did as much flat-drafting as I felt comfortable with. I actually did make two of the same sides, even though that was on my list of things to do, because I thought that somewhere along the way, I might have taken in one side and not the other.

Not so.

However, the length on my first mockup is just right, and the shaping from the old one (which I love) is still the same. Overall, it's pretty big and can basically be laced closed, but for a first mockup, I'm pretty excited! The next step will be to take it in, and figure out where to adjust the one side for overall evenness.

Tuesday, June 30, 2015

Historical Sew Monthly Challenge #6: Out of Your Comfort Zone

It seemed like the obvious choice for this particular sewing challenge, but I chose to make corded stays for an older girl. The reason it is out of my comfort zone: after seeing the disastrous results over time from a poorly constructed corset, I was nervous to make another one. And, I have never made anything with cording before, unless piping on a garment counts.

Cording is the act of sewing tiny channels into the clothing, and then running cord (more like what you might picture as kitchen string) through them. It stiffens in place of boning, or other supporting method like quilting. I also think it makes the finished product easier to wash.

If you've ever seen the tutorials for a duct-tape double, I used something a little like that for the pattern. Not taping the whole body, and then cutting the whole thing vertically into strips for the corset pattern. It worked really well, and then I just did a basic draft for the straps.

When looking at it, it almost looks like one of those earlier 19th century stays because it has no separating front busk, but the originals from that era come down considerably more. By the mid-19th century, only girls wore straps on their stays (or corsets, its the same type of garment). Next time, I think I will put in a separating front because it is a pain just to get it over her head.
She's the cutest :)


What the item is (and why it was out of your comfort zone): Corded stays (or work corset) for older girl; new cording techniques being used, + a couple hand stitched eyelets.


The Challenge: Out of Your Comfort Zone


Fabric: 1 1/2 yards cotton sateen (the whole thing wasn't used)


Pattern: My own.


Year: Mid-19th century


Notions: Thread, cording, grommets


How historically accurate is it? I have no idea. Maybe 70%; that's just a random number thrown out there.


Hours to complete:  Around 12-14. 


First worn: For pictures


Total cost: About $15; I only had to pay for the fabric and grommet refills.


All in all, I really liked working with the sateen better than cotton twill, mostly because of the soft, lightweight feel. I'm not sure how it'll hold up long-term, but I suspect she'll grow out of it in a couple years anyway.

I also plan on removing the very back cording, the row that's right between the grommets. It likes to collapse (but not so bad on the finished product as I thought), so I thought I would replace it with steel boning. I was trying really hard not to spend too much on this project because of future projects, and shipping from corsetmaking.com is expensive, even for two measly little bones. I'm waiting until I need more supplies from there before ordering. I also have yet to buy any real lacing stuff, but the cording works even if it isn't glamorous.

She's really pleased that she no longer looks 'fluffy' with a dress on; wearing a chemise without a corset on over it does tend to make you a little puffier than usual.

And, just because.....


Wednesday, June 10, 2015

A Little Bit About Visual Perception

There are plenty of thoughts on corsets; everyone is, I suppose, entitled to their own opinions, but fact should rule over fiction, and not much truth about the matter is used.

The truth about corsets...wait, let me rephrase that...the truth about fashion in the past is visual perception. Corsets were not only part of life, but the way they work is not often thought of much. When lacing a corset, it pulls evenly. This means that corset actually pull you into a round shape. Everyone knows that, normally, the waist is sort of oval shaped, making you flat in the front and very small from the side. When pulled into a round shape, it makes you small in the front, but from the side it may make you appear larger. Sadly, I have no diagrams to describe how this works, but you get the idea.

It should be acknowledged by everyone that people were healthier and naturally smaller back then. I'm not going to say that everyone was skinny, because that is most certainly not true. Corsets are part of what make you appear smaller.

The clothes worn on top also play a huge part as to how we percieve them. Take this picture for example. love this picture, because it throws people way off all the time on Pinterest. 

To use the visual perception example: she wears large skirts, which makes the waist they sit on look very small. Large sleeves also contribute. But the trim is key: notice how the trim on the front makes her look wide at the shoulders, then tapers down into a tiny point. This draws attention to that point, thus creating a 'wow, look at that waist!' moment. In reality, you can see her waist is not actually a part of that point, but the trim makes it look so.

Another fact about corsets: you cannot eat very much while wearing one. Your stomach simply doesn't have space for 'extra', so you basically can only eat the amount that your body needs. I've had it happen; I'll try to eat the amount that I normally do while wearing a corset, and major stomach aches quickly ensue. That is basically the best diet in the world!

Now, this girl, I would say, is sort of 'normal' sized, or appears so because the trim does not 'point' as well as the last one, although in our standards, she is fairly small.

Now, this image  (the one below) has quite a few theories, mainly why she is photographed from the back. I can't think of a reason why not to, with such a beautiful dress and hair. Several suggestions were in mourning, or post-mortem. After the post-mortem theory, one lady commented suggesting that maybe she died of 'small waist syndrome, or lack of oxygen'. I got a laugh, although computers do not convey the tone in which the original is speaking. This lady is also very small compared to modern standards, but I wouldn't say unusually so. Her skirts, very full worn over a hoop, lend the slendering effect I've already mentioned.


Saturday, January 31, 2015

Historical Sew Monthly #1: Foundations

I decided to use this first challenge to make sure I actually finished my corset. I did not start the corset just for the historical sew monthly, but I really wanted to make it my goal to  have it done this month so I would have the rest of the year to make whatever.


It only just occurred to me a couple days ago (I finished it last week).....I'M DONE! This has been the most challenging project I have ever taken on. I made a half-hearted attempt last January *wince* and then didn't try again til July when I recieved the Dressmaker's Guide. The instructions were so much more helpful than the pattern I bought from Joann's. The one-size-fits-none pattern. Ugh.

The Challenge:  #1: Foundations
Fabric: Cotton Twill
Pattern: Draped myself, using The Dressmaker's Guide for instructions
Year: Mid-Victorian; I was shooting for 1860's
Notions: Metal grommets, spring steel boning, busk, thread
How historically accurate is it? How about.....80%? I have no idea. No glaringly bad mistakes, some of my finish work probably isn't accurate. It gives me the right shape, though. The way I have the bones in the front definitely isn't; I will fix that.
Hours to complete: A million? Seriously, I have no idea. I started it six months ago, so a ton of hours.
First worn: To a reenactment back in September, when it was only half finished. Thankfully I have fixed the problems and was glad I had the experience to wear it for five hours to get an idea of what needed to be done.
Total cost: $75; that was why I was so hard on myself to get it right.
Anyway, I started with a t-shirt and duck-taped it, sort of like if you would make a dressform. Instead of taping your whole body, though, you only do from the bust to the waist. Then you cut it off and slice it in the places you want the corset seams to go. That was a great place to start, and I will definitely use that method again.

But after that everything went downhill. To sum up this experience in a nutshell....everything went wrong that could. From ordering the wrong size boning, to re-setting the busk three times, to cutting out new pieces, to messing with the fit so much I could cry (okay, maybe I did cry), to discovering that the fabric was stretching, to just about finishing and it doesn't sit straight on my back, it has NOT been, in reality show words, a surreal incredible journey. More like a walk through sewing hell. In the picture below, those small horizontal wrinkles are from the stretching.

So that is why it has taken me six months to complete. Procrastination got the better of me, and also fear of messing up to the point of completely starting over. Thankfully, it turned out better than I could have hoped for.

Sure, the bones in the front are about 1/2'' short, but it doesn't matter that much. The only thing I'm a little disappointed about is the placement of the boning in the front. I was following the seams I had, and it looked straight when laying flat. In the picture above, you can see what I mean. Of course, I'M not flat, so that doesn't work. Other than that, I am super excited to get on with my sewing life without that hanging over me.